How to Clean Mouldy Window Sills
We all love enjoying the various seasons of the year. But as the seasons change from snowy-covered windows to summer rains, something unwelcome can grow inside our homes: mould on window sills.
Mould is not just ugly; it can be bad for your health. Especially if you have young children at home, it can cause severe health issues like respiratory problems and can impact your mental health as well. Moreover, if you leave it too long, it has the potential to damage your home. But don't worry; dealing with this challenging problem is usually easier than you think!
Why Do Window Sills Get Mouldy
You might clean your windows regularly, but you can still notice black or green spots appear after some time. The main reason is moisture, which is usually mixed with warm temperatures and tiny bits of dirt. When all of these factors combine, mould can grow.
One of the biggest reasons, especially during cold winters, is condensation. This happens when warm, moist air from inside your home hits the cold glass of your windows. This difference in temperature causes the moisture in the air to turn into little water droplets on the window glass, which then run down onto your sills.
Another factor that can cause mould to grow is poor airflow. Humidity can stay around if your home lacks fresh air, especially in bathrooms or kitchens. This adds to condensation all over the house, including on your window sills.
Sometimes, older windows or those with damaged seals let rainwater or melting snow leak, making your sills constantly wet. This moisture can settle on surfaces, giving mould the dampness it needs to start growing.
Tools You Need for Mould Removal
Before you start cleaning mould from your window sills, gather the tools you will need. Remember that safety comes first, so ensure you have the right gear.
Rubber gloves: to protect your hands from mould spores and cleaning stuff.
Safety goggles: to keep your eyes safe from splashes and tiny mould bits floating in the air.
A face mask: to prevent breathing in mould spores, especially if you have a lot of mould.
Warm water: for rinsing and mixing detergents.
Bucket: to mix your cleaning solutions.
Scrub brush or an old toothbrush: for scrubbing stubborn spots and reaching into small cracks.
Microfibre cloths or old rags: for wiping and drying.
Cleaning solution: white vinegar, baking soda, hydrogen peroxide (3%), or bleach (diluted). Remember to use bleach with great care and only if nothing else works.
4 Steps to Get Rid of Mould from Your Sills
If you are unsure how to remove mould from your window sills, don't worry! We have easy and quick ways to clean your mouldy window sills. Follow these steps carefully to remove the mould effectively.
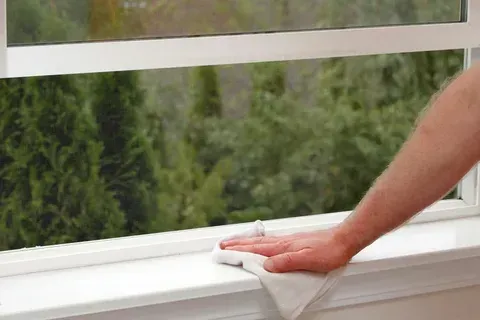
Step 1: Initial Wipe Down
Gently wipe away any loose mould or bits of dirt from the window sill using a dry paper towel or a cloth. This stops the mould from spreading when you add water. Ensure that you put the used cloth in a sealed bag right away and dispose of it.

Step 2: Choose Your Cleaning Solution
It depends on which cleaning solution you pick to remove your mouldy sills. You have options like white vinegar, baking soda paste, hydrogen peroxide (3%), bleach, and more. We are listing below the most commonly used mould cleaning agents:
White Vinegar
White vinegar is the best natural mould killer. It works well on about 82% of mould types and won't harm most surfaces. It's also safer than bleach. Pour undiluted white vinegar into a spray bottle and spray it generously onto the mouldy area. But ensure the area is well-covered with vinegar. Let it sit for at least an hour; this gives the vinegar time to soak in and kill the mould. After an hour, scrub the area with your brush. You should see the mould starting to come off. Finally, wipe it clean with a damp microfibre cloth.
Baking Soda Paste
Baking soda is a mild scrubber and a natural mould fighter. It's great for scrubbing without scratching your beautiful windows. To use this cleaning formula, mix equal parts of baking soda and water to make a thick paste. Put the paste directly onto the mouldy areas and let it sit for 10-15 minutes. Then, use your brush to scrub off the paste. The scrubbing action will help lift the mould. After that, wipe it clean with a damp cloth.
Hydrogen Peroxide (3%)
Hydrogen peroxide is another effective, safe alternative to bleach. Pour 3% hydrogen peroxide into a spray bottle and spray it directly onto the mould. Let it sit for 10-15 minutes to kill the mould. Scrub gently, and then wipe it clean with a damp cloth.
Bleach
Bleach kills mould, which you can see on the surface, but doesn't always get deep into porous materials to kill the roots. It means that the mould can come back after some time. Moreover, bleach also has strong fumes and can damage some surfaces.
Never mix bleach with vinegar or any other cleaning product, as this can create dangerous gases. Mix 1 part bleach with 10 parts water in a bucket to use it. Dip a cloth into the mix and carefully put it on the mouldy areas. Do not spray bleach, as it can irritate your breathing. Let it sit for 10-15 minutes. This is very important: Rinse the area thoroughly with clean water to remove all bleach residue. Ensure the area has lots of fresh air while using bleach and after.
Step 3: Rinse and Dry Thoroughly
Once you've scrubbed and the mould is gone, it's essential to rinse the area with clean water to remove any cleaning solution left behind. Then, use a dry, clean microfibre cloth to dry the window sill completely. Moisture is mould's best friend, so ensure you have dried the surface well.
Step 4: Check and Repeat if Needed
Sometimes, especially with deeper mould stains, one try might not be enough. If you still see discolouration or greenish or black spots appearing on your window sills, you must repeat the cleaning steps without wasting another minute. If you aren’t getting enough time to clean your windows, you can get help from professionals like Neighbours Windows to remove mould from your window sills.
Post-Cleaning to Prevent Mould Growth
The real win is stopping mould from growing back. To do that, you must regularly open windows for a few minutes each day, even in winter, to let fresh air move around. You should also think about using extractor fans in bathrooms and kitchens.
Moreover, try to manage humidity in your home. You can use a dehumidifier, especially in basements or other damp parts. Make it a habit to wipe down condensation that forms on your windows and sills each morning.
Remember to check for leaks now and then. Regularly inspect your window seals and frames for any signs of leaks and fix them quickly. If you think your window seals are rotten or you keep having problems with them, it might be worth getting professional advice.
Conclusion
Dealing with mould on your window sills might seem challenging, but with the proper steps and effort, you can keep your home looking fresh and healthy. Once mould appears, it can be extremely harmful to your windows and impact your overall health, making you sick and weak.
The best move is to clean your mouldy window sill using the correct cleaning method and appropriate cleaning detergents. You can use bleach, baking soda paste, Hydrogen Peroxide, etc. to kill the toxic mould.
However, you must remember that stopping it before it starts is always smart. Understanding why mould grows and taking simple cleaning steps will ensure your window sills stay clean, letting you enjoy that beautiful view without any unwelcome fuzzy bits!